School Rain Gardens: A Planning Roadmap for Campuses
A school rain garden fails before the first shovel hits the ground when nobody owns the maintenance, the runoff path is guessed, or the soil cannot drain. The planting day only makes the failure visible.
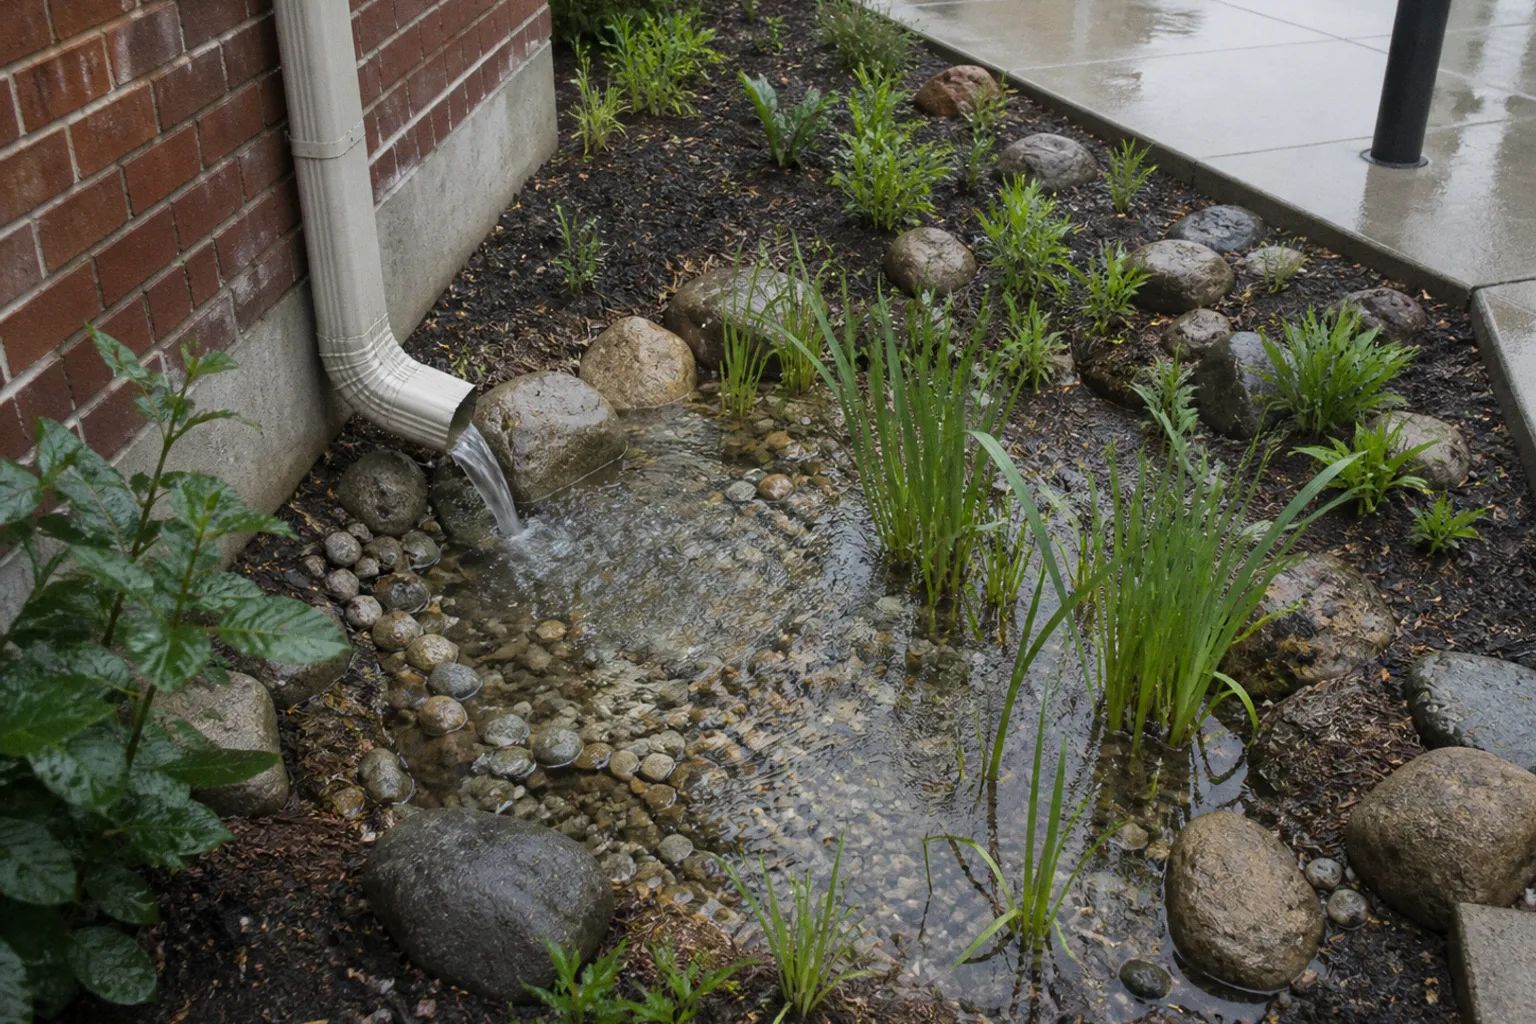
School campus rain garden planning milestones need to run in order: approval, runoff mapping, infiltration testing, hydraulic sizing, excavation, planting, and maintenance. Skip one and the basin becomes a muddy hole, a damaged foundation, or a fenced-off liability. Build the sequence correctly and the project becomes a working piece of campus stormwater management, not a one-day environmental display.
We work from the ground up. First we find where the water goes. Then we confirm whether the soil can take it. Only after that do we set the dimensions, choose the plants, and bring students onto the site.
Secure the site before you design it
A rain garden sits inside a working school campus. That means the first constraint is not soil. It is control.
The school administration must approve the location. The principal, facilities or custodial team, parent groups, teachers, and any organization supplying labor or materials need to know what is being built and who will handle it after installation. A garden that has no assigned caretaker is not a green initiative. It is deferred maintenance with a signboard.
We need written agreement on five basic points:
- Which part of the campus is available for excavation.
- Who authorizes digging near utilities, drains, play areas, and buildings.
- Who supplies tools, soil amendments, plants, mulch, and replacement materials.
- Who inspects the basin after heavy rain.
- Who removes litter, controls invasive growth, and repairs erosion.
The maintenance question must be answered before the design is fixed. A rain garden may need periodic weeding, mulch replacement, sediment removal at the inlet, and replanting after damage. The work is manageable. It is not invisible.
Custodial staff should be involved early because they know how water, waste, vehicles, and students actually move across the campus. A plan drawn without them usually places the garden where a maintenance cart needs to turn, where swept litter collects, or where a downpipe discharges with more force than the basin can handle.
PTA groups and teachers bring another kind of information. They know which areas are used during assemblies, sports, lunch breaks, and outdoor lessons. A technically sound basin placed in a traffic lane will be compacted and damaged. A safe basin placed outside all normal routes may be ignored. We need both functions to fit.
A rain garden is not finished when the plants go in. It is finished when the school can maintain the water path without guessing.
Set the approval boundary
Before mapping the campus, establish the no-go areas. Mark building foundations, retaining walls, septic or sanitation systems, utility corridors, play equipment, vehicle routes, and any location where standing water could create a safety conflict.
Do not place the garden directly beside a building foundation. The required setback depends on local guidance, construction details, drainage conditions, and the infiltration test. Many rain garden guidelines use a setback of roughly 10 feet as a working reference, but that is not a universal permission slip. We confirm the actual requirement for the site before excavation.
The same rule applies to underground infrastructure. If the campus does not have reliable utility drawings, we do not treat the absence of a visible marker as proof that the ground is clear. Locate the service lines or redesign the garden.
At this stage, the project should produce a simple site control sheet:
| Site control | Decision required | Failure if skipped |
|---|---|---|
| Building setback | Confirm a safe distance from foundations and walls | Water moves toward the structure |
| Utility clearance | Locate buried services before digging | Service strike or project shutdown |
| Maintenance access | Preserve a route for tools and carts | Basin becomes difficult to service |
| Student movement | Keep edges away from high-traffic routes | Trampling, slips, and damaged plants |
| Ownership | Assign inspection and upkeep duties | Decline after the first season |
This is not paperwork for its own sake. It is how we keep the design from being overruled by the first operational problem.
Map the runoff before choosing the footprint
A rain garden does not collect rain evenly from the whole campus. It receives water from specific surfaces: roof downpipes, paved walkways, courtyards, parking areas, compacted ground, or a shallow slope carrying water from another part of the site.
We map the runoff first. The map does not need to be a polished engineering drawing to be useful. It needs to show where water starts, how it travels, where it concentrates, and where it currently causes trouble.
Walk the campus after rainfall if conditions allow. Follow the marks left by water. Look for sediment lines, eroded soil, clogged grates, exposed roots, ponding at low points, and dark channels through grass. The ground usually gives a more accurate account than a plan made at a desk.
Record:
- Roof areas that discharge through downpipes.
- Hard surfaces that shed water quickly.
- Existing drains and their inlet levels.
- Low points where water already gathers.
- Slopes leading toward buildings or play spaces.
- Soil areas that remain wet or compacted.
- Locations where litter and sediment accumulate.
- Routes used by students, staff, service vehicles, and emergency access.
A downpipe can be disconnected and redirected into a rain garden in some designs, but the discharge must enter in a controlled way. A concentrated outlet can cut a channel through mulch and expose plant roots. Where flow arrives with force, we may need an inlet pad, stone protection, or another erosion-control measure before the water spreads across the basin.
Read the water path, not just the puddle
The largest visible puddle is not automatically the right garden location. It may sit beside a foundation, over compacted subgrade, or at a point where water has nowhere safe to leave. The garden needs a reliable inflow and a soil profile that can drain.
A suitable location generally has four conditions:
1. The runoff source is identifiable. We know which roof or paved area feeds the basin.
2. The flow can be slowed and distributed. Water enters across a stable edge rather than cutting one channel.
3. The garden can sit clear of structures and critical routes. The basin does not create a new hazard.
4. The soil can infiltrate within the required drawdown period. Water does not remain in the basin beyond the design limit.
Rain gardens can absorb up to 30 percent more rainwater than conventional lawn turf, but that figure does not rescue a poor site. Absorption depends on the soil, the basin, the incoming volume, and the maintenance condition. We do not use a general performance number to bypass site testing.
Map the drainage area with the future garden in mind. A small basin receiving a large roof discharge may overflow. A large basin receiving only occasional trickle may waste space and become difficult to justify. The footprint must match the water source and the ground conditions.
Test infiltration before excavation
The percolation test is the point where the plan meets the soil. Until this test is done, the proposed basin is only a location marked on paper.
The test confirms how quickly water moves through the soil. It also exposes compacted layers, fill, clay, rubble, and other conditions that can block infiltration. School grounds are often disturbed by construction, utilities, sports use, and repeated foot traffic. The surface may look like soil while the actual drainage layer sits below a compacted barrier.
A basic test sequence should be set out and recorded consistently:
1. Dig a test hole in the proposed garden area to represent the expected basin depth.
2. Remove loose debris and inspect the soil profile.
3. Saturate the hole so the surrounding soil reaches a wet condition.
4. Refill or monitor the hole according to the selected testing method.
5. Record the water-level change over a measured period.
6. Repeat the test at more than one point if the site has visible variation.
7. Compare the result with the drawdown requirement and adjust the design.
The exact test method may vary by local guidance and professional requirement. The field rule does not change: we need evidence from the actual ground, not a rate borrowed from a nearby property.
A rain garden should be engineered so that standing water filters and drains into the soil in less than 48 hours. The basin is not a permanent pond and should not be treated as one. If water remains beyond the design period, the site may have a slow soil layer, an undersized outlet, excess inflow, compaction, or a construction defect.
Use the test to make a hard decision
The infiltration result should drive one of three decisions:
- Keep the proposed location and size the garden around the measured capacity.
- Modify the soil profile and drainage design under competent technical guidance.
- Bypass the location and select a different section of campus.
The third option is not failure. It is cheaper than building a basin that stays saturated and then defending it during every rainy period.
Do not make the basin deeper simply because the soil drains slowly. Extra depth can increase storage while doing nothing to solve the infiltration bottleneck. It can also create unsafe side slopes, increase excavation volume, and make maintenance harder. We repair the limiting layer or move the garden.
The test also affects the maintenance plan. Soil with marginal infiltration may require closer inspection, controlled inflow, and more frequent removal of sediment and compacted material. The school needs to accept that workload before construction starts.
Build the basin around soil depth and drawdown
Once runoff and infiltration are known, we can set the cross-section. This is where many educational rain garden installation projects lose discipline. The surface looks simple, so the underground profile gets treated as optional. It is not optional.
Excavated rain gardens often use a soil mix layer up to 60 centimetres deep. That layer supports infiltration and plant establishment. Above it, approximately 25 centimetres may be reserved for plant roots, organic mulch, and temporary water pooling, depending on the design. These numbers are not decorative dimensions. They define the working volume of the basin and the depth available for roots and filtration.
We need to distinguish between:
- Excavation depth.
- Installed soil mix depth.
- Surface depression depth.
- Mulch thickness.
- Root-zone depth.
- Any stone, inlet, underdrain, or overflow element.
If the crew excavates 60 centimetres but replaces only part of that volume with suitable soil, the design has not been built to its stated section. If the final surface is too high, the basin loses storage. If it is too low, the garden may hold water longer than intended or expose plants to excessive saturation.
Shape the side slopes for people and water
Rain garden side slopes should be gentle. A common recommendation is a 3:1 slope or flatter. That means the horizontal run is at least three times the vertical rise. Gentle slopes reduce erosion and make the edge safer to approach, inspect, weed, and mow around.
Steep sides create several problems:
- Flow concentrates and cuts rills into the basin.
- Loose mulch moves downhill.
- Students can slip into the depression.
- Mowers and maintenance tools become harder to use.
- The edge may collapse after repeated saturation and drying.
The basin floor should be level enough to spread water rather than send it to one low corner. If the site has a strong natural grade, the design may need a terrace, level spreader, or another method to distribute inflow. We do not rely on a shallow depression to correct a slope by itself.
The inlet needs an armored transition where required. Stone, dense planting, or a constructed energy-dissipation feature can reduce the force of incoming water. The material must be sized for the flow path, not selected because it looks tidy in a catalog.
Keep an overflow route
A rain garden handles a design volume. It does not eliminate every flood path on the campus. During larger storms, excess water must leave without moving toward a building, play area, electrical equipment, or a pedestrian route.
The overflow route should be visible on the plan and understandable to the maintenance team. It should not depend on a buried assumption that water will find its own way. Grade the overflow toward a safe downstream location. Protect the outlet from erosion. Inspect it after heavy rain.
This is where campus stormwater management projects become operational rather than ornamental. The garden is one component in a drainage system. It must connect to the wider site without creating a new failure point.
Select native plants that can take the cycle
Plant selection follows the hydrology. We do not choose plants first and force the water around them.
The garden will move through wet and dry periods. The center may receive temporary pooling while the upper edge drains faster. Plants need to tolerate those conditions and fit the local climate and soil profile. Native plants are the default because they are adapted to local conditions and support the ecological purpose of the project, but “native” alone does not guarantee survival. The species must match the moisture zone.
Divide the basin into planting zones:
- Lower basin: Plants that tolerate short periods of saturation.
- Middle basin: Plants that handle alternating wet and dry conditions.
- Upper edge: Plants suited to faster drainage and occasional dry soil.
- Inlet area: Tough groundcover or protected planting that can resist incoming flow.
- Outer margin: Plants that define the edge without obstructing visibility.
Avoid species that spread aggressively into nearby planting beds or require constant irrigation. Avoid tall growth that hides sightlines near paths. Avoid thorny plants beside student routes. Avoid plants that cannot tolerate the soil mix or the seasonal water pattern.
The nursery or community supplier should provide the botanical names, source, planting size, and expected water tolerance. If the supply chain is uncertain, design with a smaller number of dependable species rather than a long list that cannot be sourced consistently.
Control the planting operation
Planting order affects the finished garden. Students and volunteers should work from the center outward. This keeps people from trampling newly installed native transplants and compacting the soil around the root zone.
Set temporary access paths before the planting day. Mark the basin edge. Stage plants and tools outside the excavation. Keep soil stockpiles away from the inlet and overflow. If the crew walks through the finished basin repeatedly, the surface will be compacted before the first storm tests it.
The planting sequence should be direct:
1. Confirm the basin profile and soil depth.
2. Protect the inlet and overflow route.
3. Mark the moisture zones.
4. Place plants from the center outward.
5. Firm the soil around each root ball without sealing the surface.
6. Apply mulch without burying plant crowns.
7. Water according to the establishment plan.
8. Remove temporary materials and inspect the flow path.
Mulch helps control splash, weeds, and surface drying. It is not a substitute for correct soil or drainage. Keep it out of the inlet where it could block the flow path.
Turn the garden into a working school system
A school rain garden has two outputs. The first is hydraulic: it intercepts and filters runoff. The second is educational: it gives students a real system to observe, measure, and maintain.
The educational layer works only if the garden remains accessible and legible. Add a simple site marker or diagram showing the runoff source, inlet, basin, planting zones, and overflow route. The sign should explain the system in plain language. It should not claim that the garden permanently stores water or functions as a wetland.
Teachers can connect the garden to several subjects without turning the site into a lecture platform:
- Students can measure rainfall and record how quickly the basin drains.
- Science classes can compare infiltration in planted soil and compacted ground.
- Geography lessons can trace roof runoff and surface slope.
- Mathematics classes can work with basin dimensions and water-level observations.
- Environmental clubs can inspect litter, sediment, mulch, and plant survival.
- Construction or vocational groups can document materials and repair erosion controls.
The monitoring plan needs fixed observations. A student should be able to answer what was measured, when it was measured, and what action follows from the result. “The garden looks healthy” is not a maintenance record.
Track:
- Whether the inlet is open.
- Whether the basin drains within 48 hours after rainfall.
- Whether sediment has formed a plug or fan at the inlet.
- Whether erosion channels are visible.
- Whether mulch has moved from the basin.
- Whether plants are upright, rooted, and occupying their assigned zones.
- Whether the overflow route remains clear.
- Whether foot traffic or vehicles have entered the planting area.
Do not ask children to enter the basin after a storm or handle unstable soil, sharp debris, contaminated runoff, or damaged materials. Supervised observation from the edge is enough. The project is meant to teach how infrastructure works. It should not create a second hazard while doing so.
Sequence the work so the ground does not fight back
The project should move through milestones in a controlled order. The sequence below is a working roadmap, not a fixed national schedule. Weather, approvals, procurement, campus calendars, and local construction requirements will change the timing.
Milestone 1: Ownership and site approval
Confirm the location, authority to excavate, maintenance responsibility, and student access rules. Resolve the foundation, utility, traffic, and safety boundaries.
Milestone 2: Runoff mapping
Trace water from roofs and hard surfaces. Mark existing drains, low points, erosion, and overflow destinations. Identify where a controlled inlet can be built.
Milestone 3: Percolation testing
Test the proposed basin area. Check for compacted layers and variation across the site. Record the result and use it to keep, modify, or reject the location.
Milestone 4: Concept and technical design
Set the basin footprint, depth, side slopes, inlet protection, overflow route, soil mix, mulch, and planting zones. Confirm that the design can drain within 48 hours.
Milestone 5: Materials and crew control
Secure suitable soil, native plants, mulch, stone, tools, protective equipment, and any required construction support. Assign one person to control grades and one to record changes in the field.
Milestone 6: Excavation and profile inspection
Protect the surrounding campus. Excavate without smearing or compacting the basin floor. Inspect the soil profile before placing the soil mix. Check levels at the inlet, basin floor, and overflow.
Milestone 7: Planting and surface finish
Install plants from the center outward. Protect the root zone. Finish the mulch and inlet. Keep the overflow visible and open.
Milestone 8: Commissioning and handover
Run water through the inlet in a controlled test if conditions allow. Watch for concentrated flow, ponding in the wrong area, edge erosion, and overflow movement. Hand the school a maintenance map with names, inspection points, and response actions.
That last milestone is routinely skipped. It should not be. A project without handover depends on memory, and memory disappears when staff change.
If nobody can point to the inlet, the overflow, the maintenance owner, and the 48-hour drainage check, the garden is not commissioned.
Common failures we bypass
The same breakdowns appear across community green initiatives. They are not caused by a lack of enthusiasm. They are caused by a weak sequence.
The garden is placed where the puddle already sits.
The low point may be beside a foundation or over compacted fill. We test the soil and trace the source before accepting the location.
The design uses a generic planting list.
Plants are selected without separating wet and dry zones. We match each planting area to its moisture cycle and local availability.
The basin is overfed by one unprotected pipe.
Concentrated discharge erodes the inlet. We slow and spread the flow before it reaches the soil surface.
The excavation is shallow because the crew wants to finish before lunch.
The soil profile loses its intended depth, reducing filtration and root space. We inspect the section before planting.
The slope is too steep.
The edge erodes and becomes difficult to access. We use 3:1 slopes or flatter where the site allows.
The school treats the garden as a planting bed.
The inlet clogs, mulch shifts, and nobody records drawdown. We hand over a flow map and an inspection routine.
Students are used as a labor substitute.
Children compact the basin, enter unsafe areas, or handle unsuitable materials. We put students on observation, documentation, and controlled planting tasks. Excavation, utility clearance, grading, and heavy hauling stay with trained adults.
The sign promises too much.
A rain garden is described as a pond, flood-proofing system, or permanent wetland. We describe what it actually does: receives runoff, holds it temporarily, filters it through soil, and drains it within the designed period.
Final field check
Before we release the site, we verify the ground rather than the presentation.
- The administration and maintenance team know who owns the garden.
- The runoff source and inlet are marked.
- The basin is separated from foundations, utilities, traffic, and unsafe routes.
- Percolation testing has been completed at the proposed location.
- The soil profile matches the design, with the specified depth installed.
- The basin drains within less than 48 hours under the intended operating conditions.
- Side slopes are 3:1 or flatter where specified.
- The inlet is protected against erosion.
- The overflow route leads somewhere safe.
- Native plants are assigned to the correct moisture zones.
- Students have a defined, supervised role.
- The inspection and repair routine is written down.
School campus rain garden planning milestones are not a ceremonial sequence. They are load-bearing controls. Approval keeps the project alive. Mapping keeps the water honest. Testing keeps the basin from becoming a pond. Soil depth, slope, planting, and overflow turn the design into a working system.
We do not build the garden for the planting day. We build it for the next monsoon, the next maintenance round, and the next staff member who has to understand the site without calling the original crew.